
DIY Boho Cane Cabinet Furniture Flip
How do you give an epic furniture makeover to a pair of $70 FB marketplace cabinets. Watch the process from start to finish, and see how many disasters I hit along the way.

THE INSPIRATION
Boho cane furniture is so hot right now, but it’s also expensive AF. I’ve been geeking out over these types of gorgeous black cane cabinets, but not jazzed on their price tag. Plus, it seems like the furniture I love the most never comes in the dimensions I need.

$2,595 cabinet from HKLiving.

$1595 Webbing Credenza from HKLiving
In searching for cheaper alternatives, I found beautiful cane cabinet dupes that both DIY Danie and Lone Fox have tackled. Had I ever used a jigsaw? Nope. Did I care? Nope. If I could save a couple THOUSAND dollars, I was down to do it.
SUPPLIES
2 Cabinets (Sourced from FB Marketplace)
Jigsaw
Staple gun
Primer
Black paint
Cane webbing: https://www.caneandbasket.com/
Legs: https://amzn.to/3aNvsgc*
Handles: https://amzn.to/3nt27wI* (Note: I wish I would have used a cabinet hole template to drill the hardware holes evenly)
THE PROCESS
It took me about two months to find the perfect cabinets on FB Marketplace. I had very particular specs because I wanted them to be…
Deep enough to hold vinyl records (12 inches deep minimum)
Waist height (so many credenzas are very low)
Wide enough to fit the wall they were going on (we love proper scale in this house)
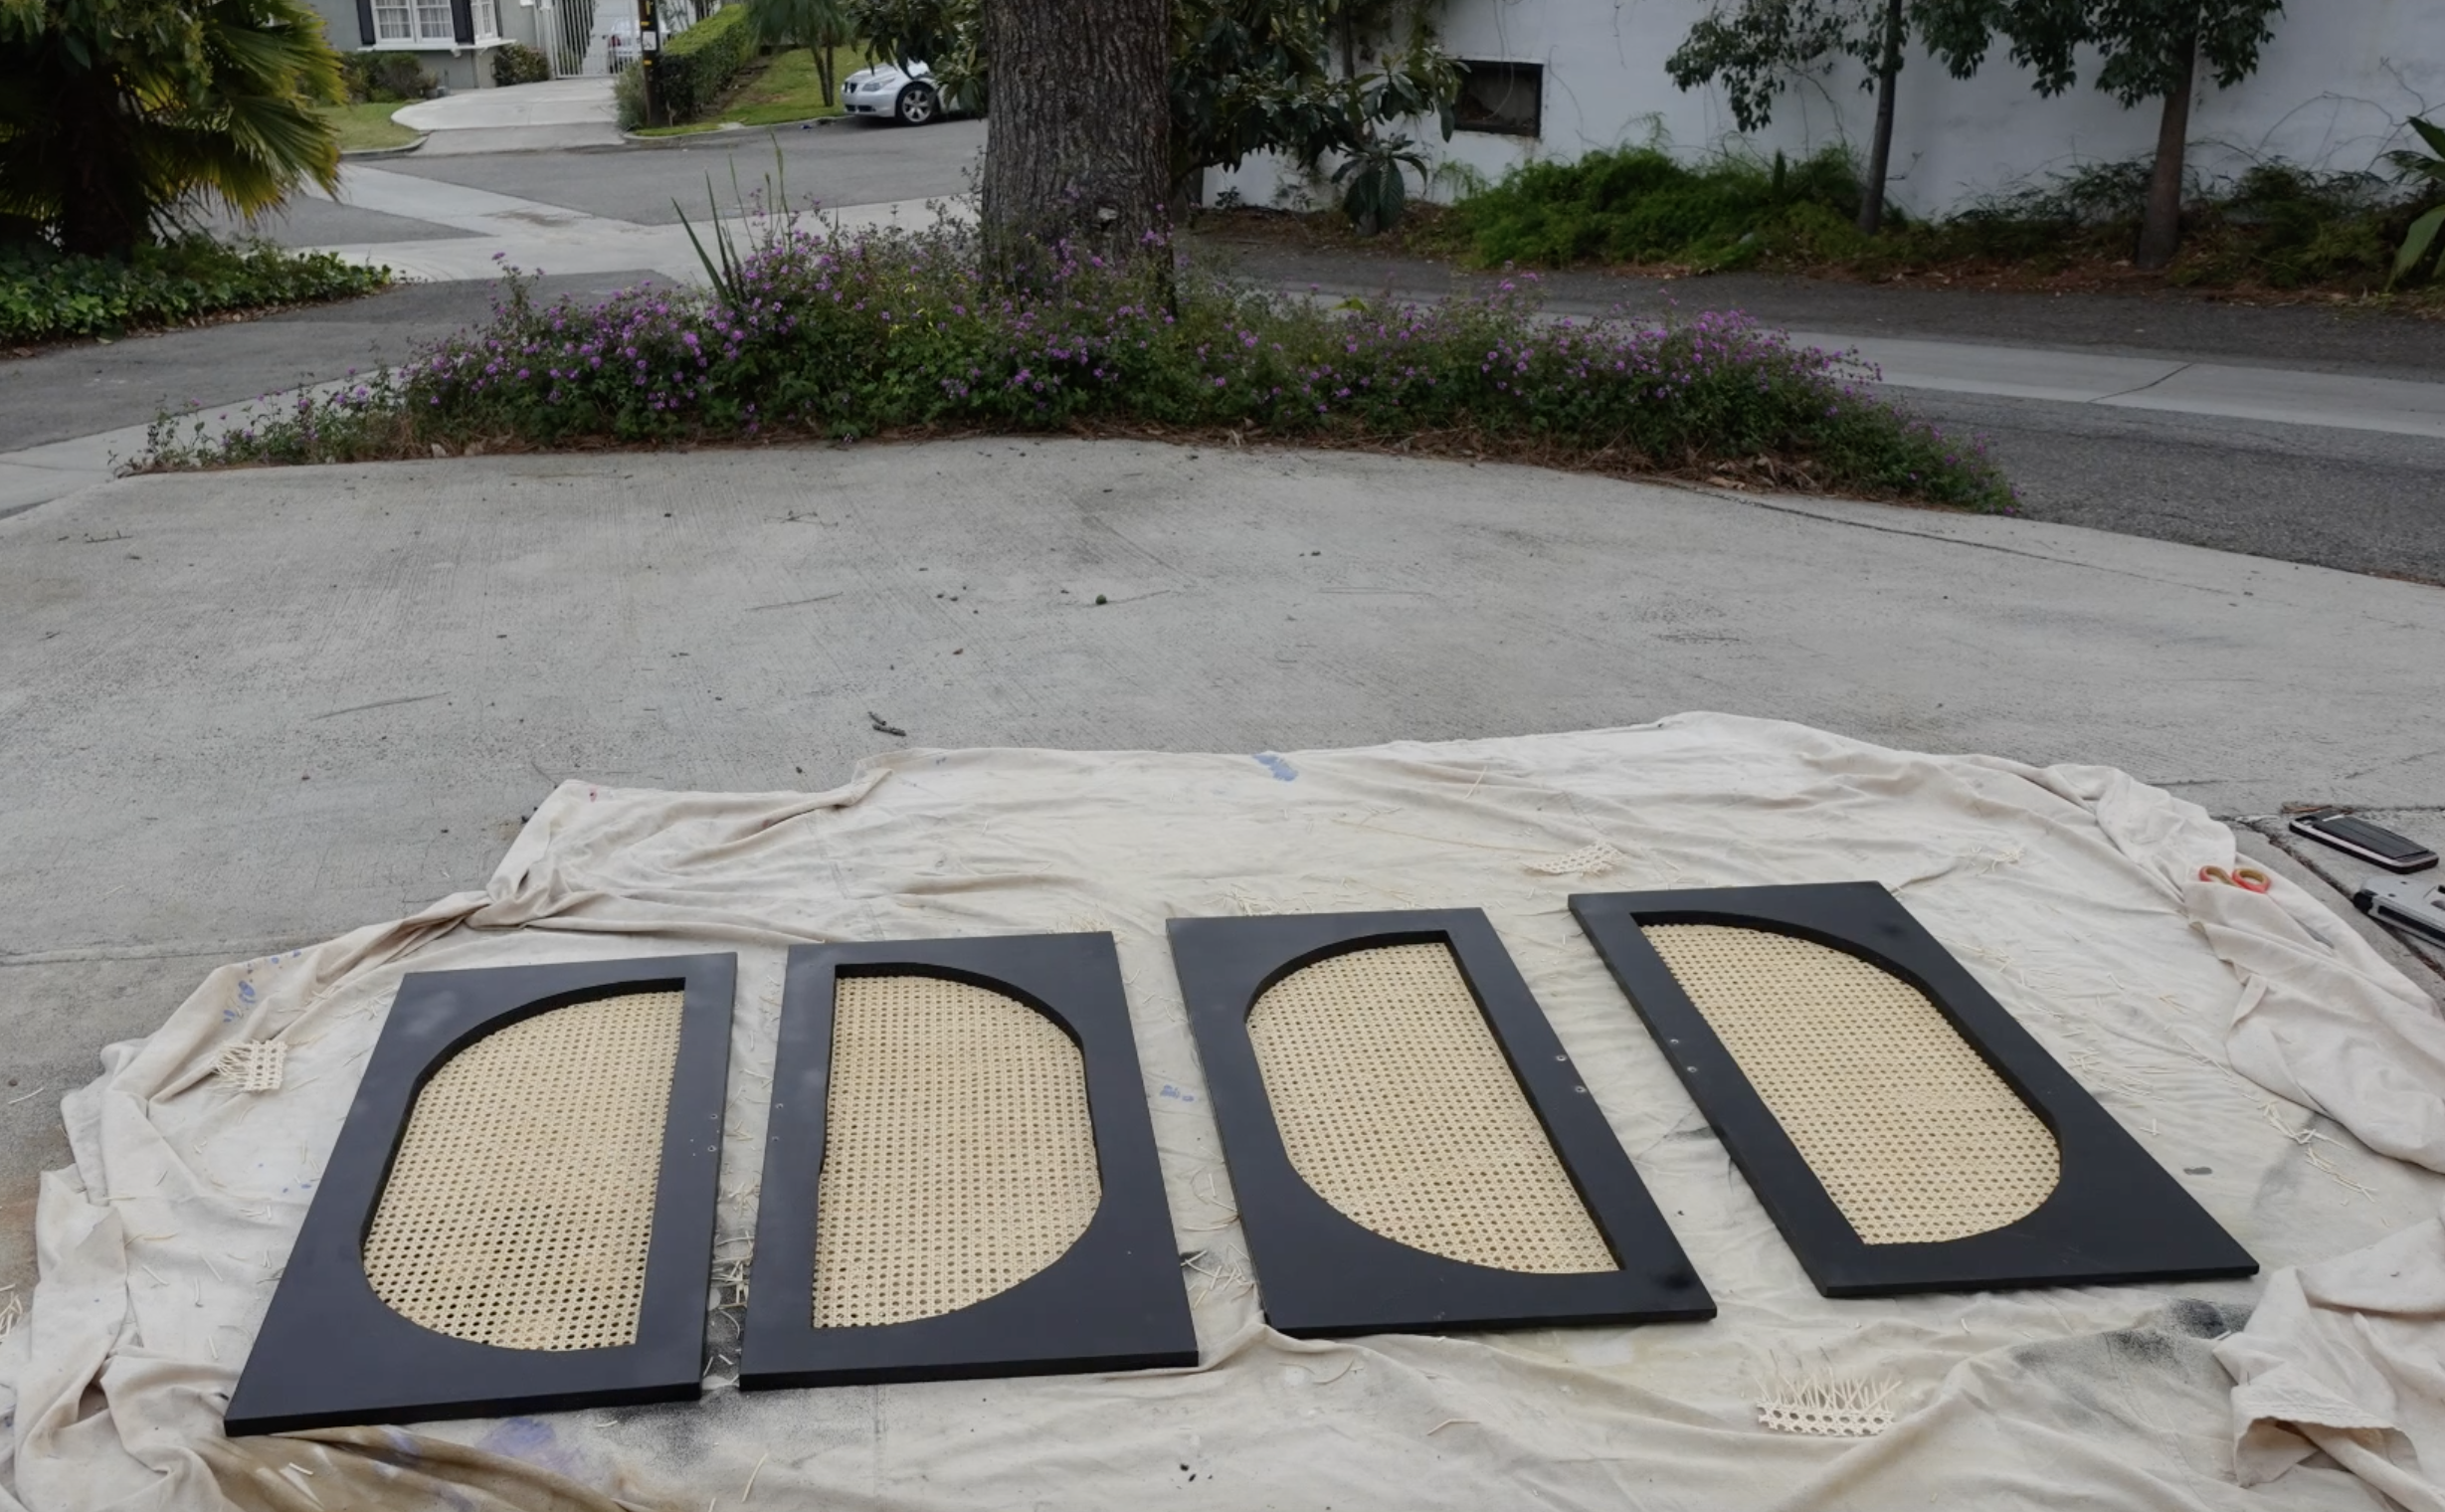
I also wanted them to have flat fronts. I’ve seen lots of cabinets with door detailing that would be cool to cane (e.g., arch or diamond), but I had a particular vision for the shape I wanted. Plus, knowing this would be my first time cutting a design out, I needed it to be as simple as possible.
Luckily, I found a pair of flat-front cabinets for $70 ($35 each—big score). Shoutout to the disgruntled ex-wives of FB Marketplace who are selling their lawyer ex-husband’s office furniture for cheap. We love you forever. ;)

STEP 1: Take it all apart.
Remove all hardware (and keep it in a bag or container unless you want to lose it and cry for 5 years).
STEP 2: Trace your door cutouts.
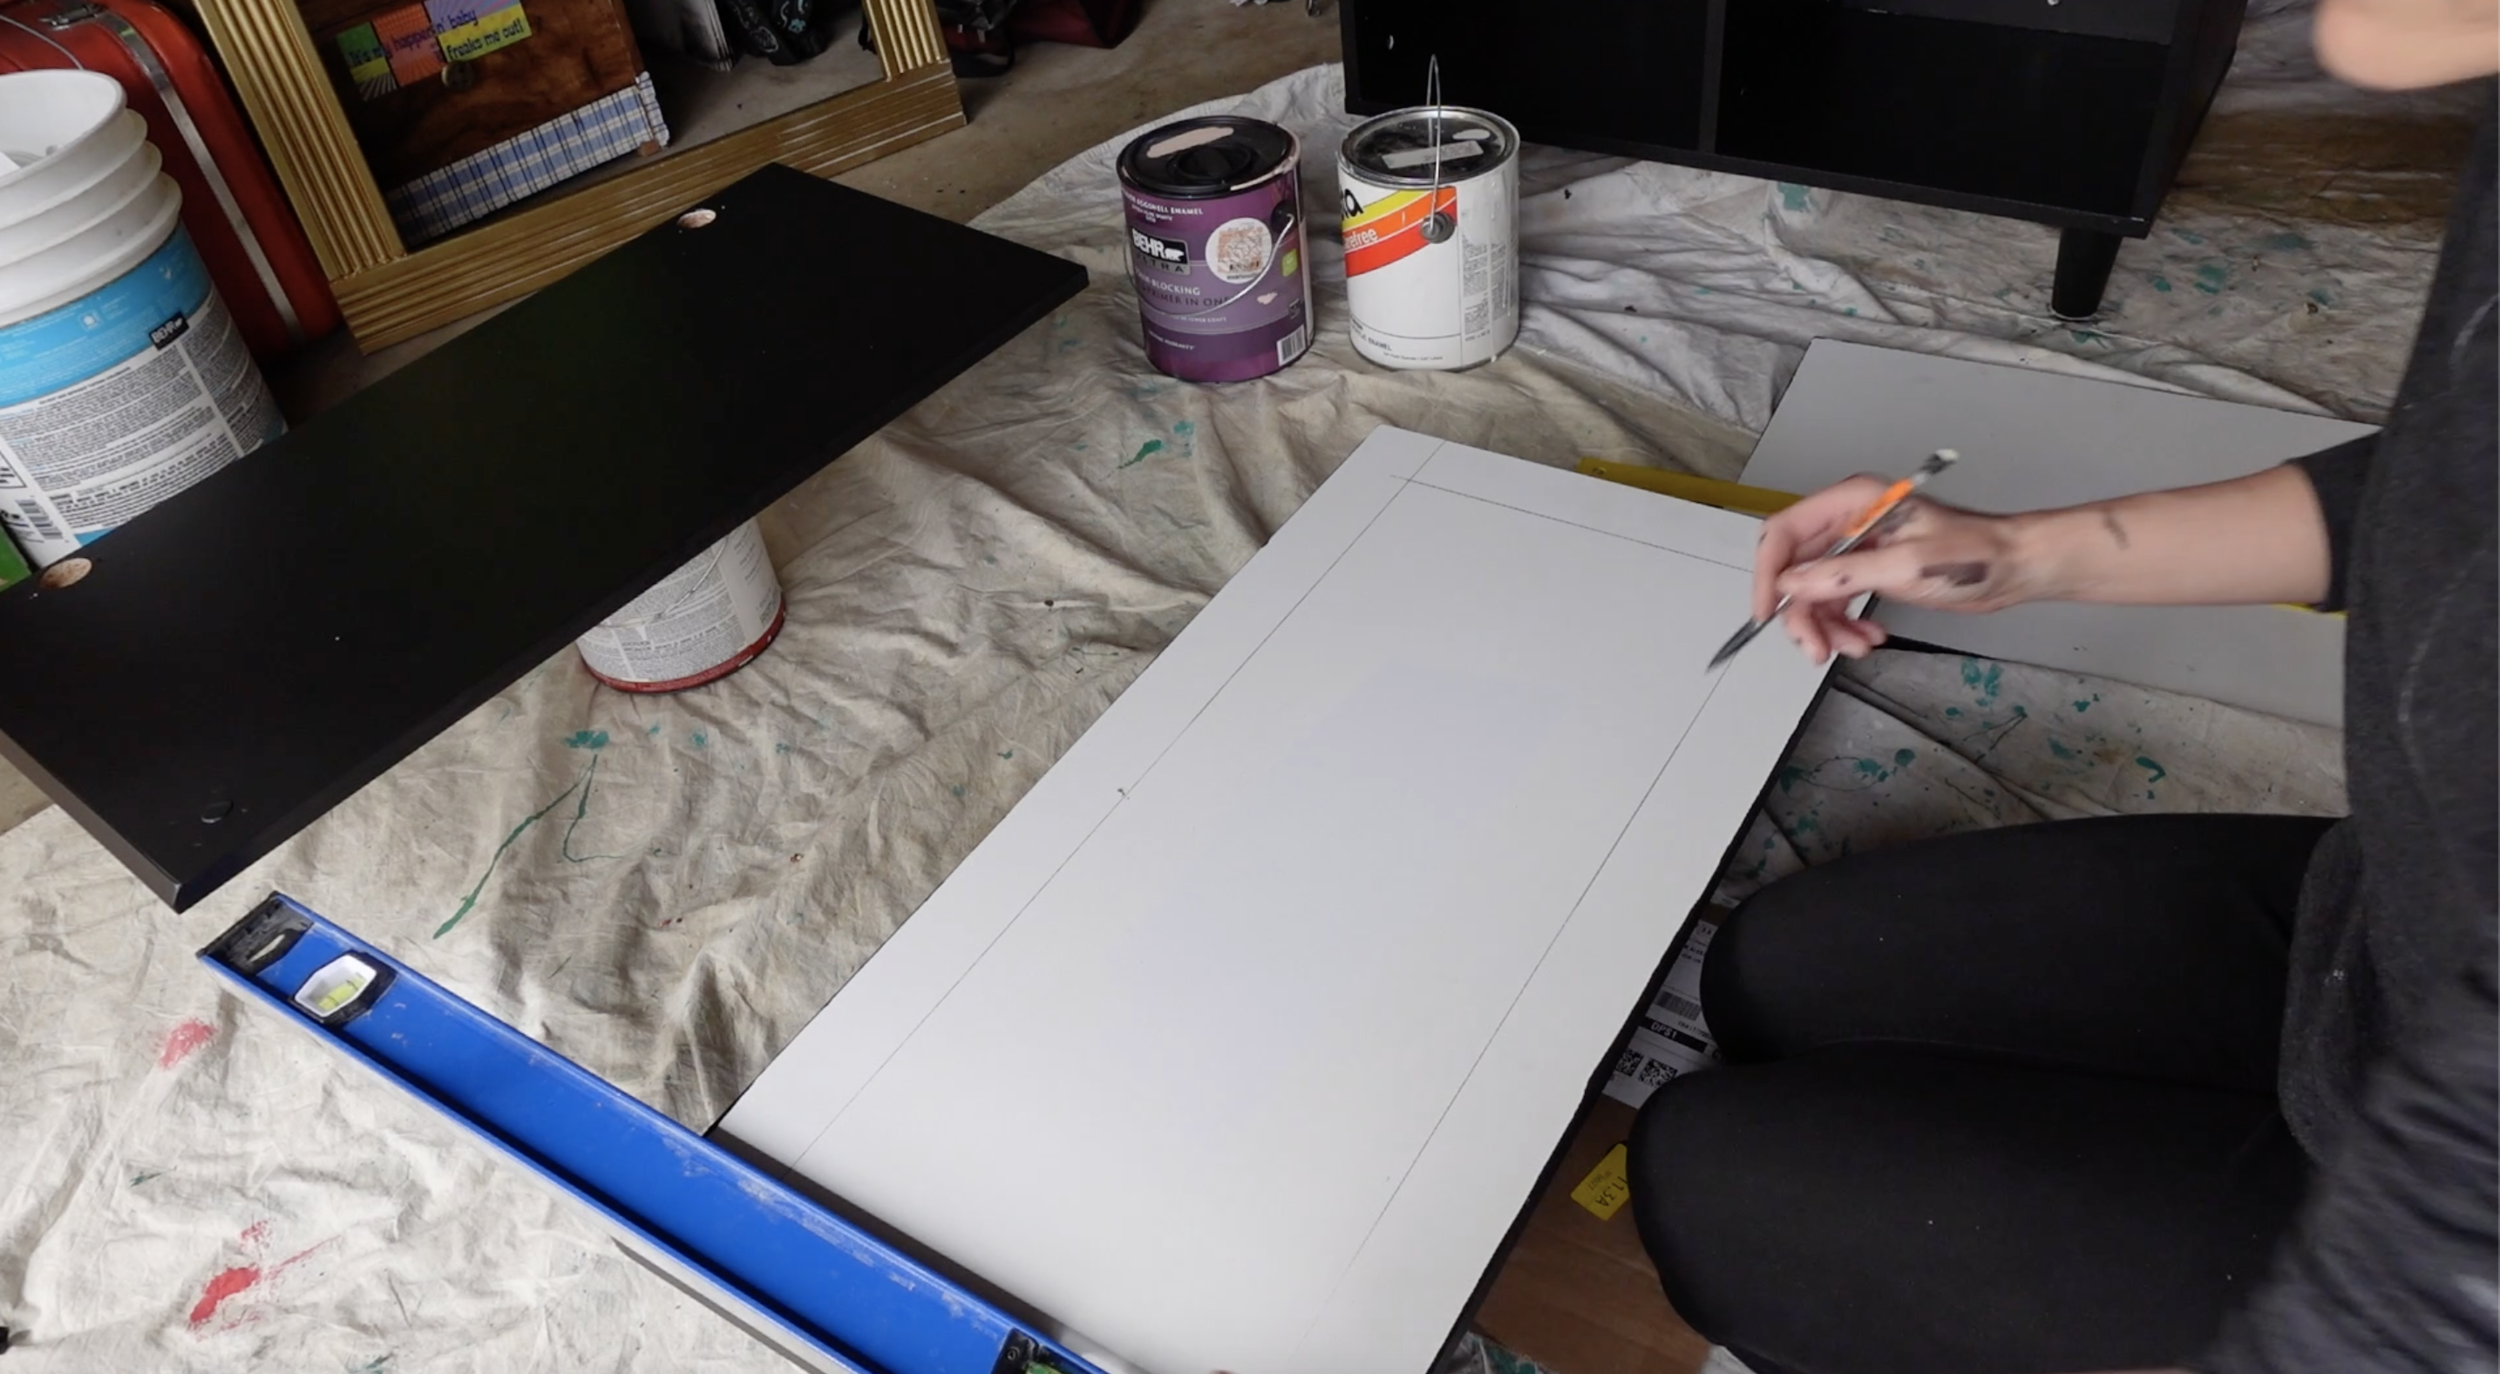
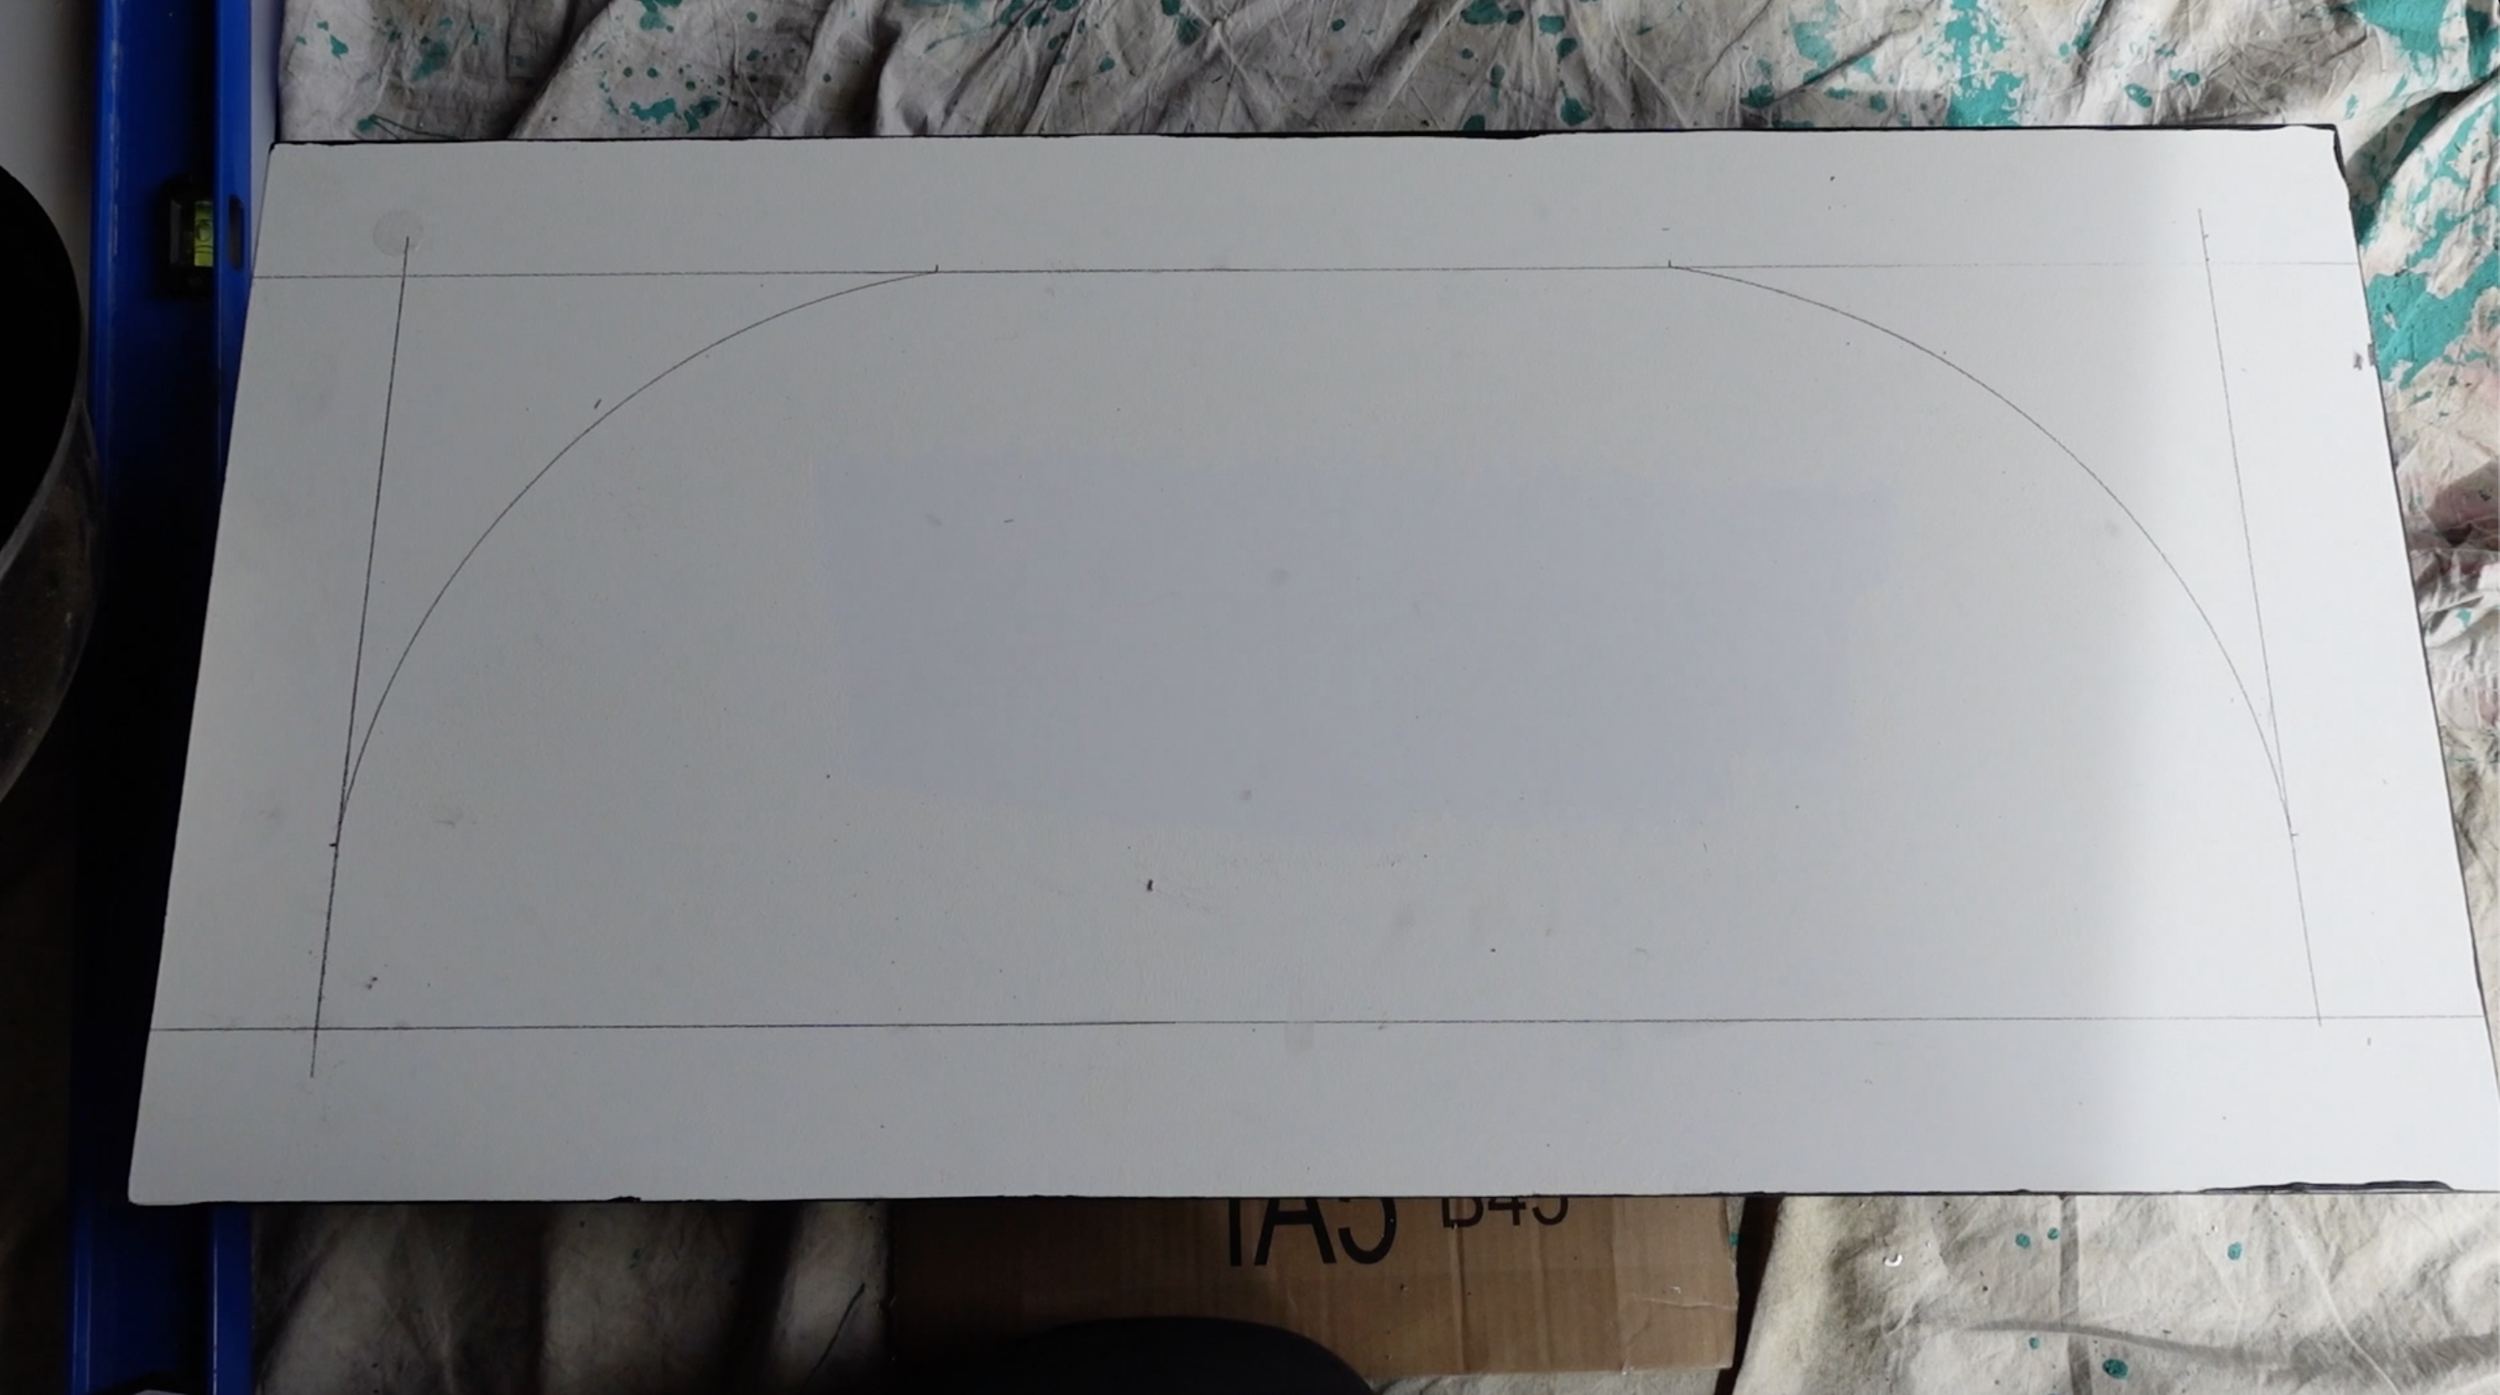
You may choose any shape you want. I wanted a semi-circle. (She’s having a circle-arch-rounded-edge-moment, but aren’t we all?) I’m horrible at measurement, so I decided to use a level to draw an interior rectangle (about two inches from the edge), then I marked the start and end points for the arch, and used a dusty-ass garbage can lid to trace the arch.
STEP 3: Cut the shapes out.
I’d never used a jigsaw before, and I was genuinely terrified. I was also using my stepdad’s tools, which are very “vintage” (by which I mean they overheat, and the blades snap, and maybe they aren’t the safest). I drilled a hole in the center area to get the jigsaw in, then used the jigsaw to slowly (and painstakingly) freehand cut the arches. For my first saw-based project with a somewhat tricky shape, I’m pretty proud of the results. It took about 8 hours, and I was very sore after. I also didn’t use clamps to secure the cabinet fronts. USE CLAMPS TO SECURE THE CABINET FRONTS!

STEP 4: Sand, prime, and paint.
The cabinets I bought were laminate (boo). TBH, I didn’t do the best job of sanding effectively. So don’t be like me. Sand well, prime with your primer of choice, and paint with your color of choice. Obviously, I chose black. I also wanted to add a bit of height, so I added legs, which I also painted black.

STEP 5: Add the cane.
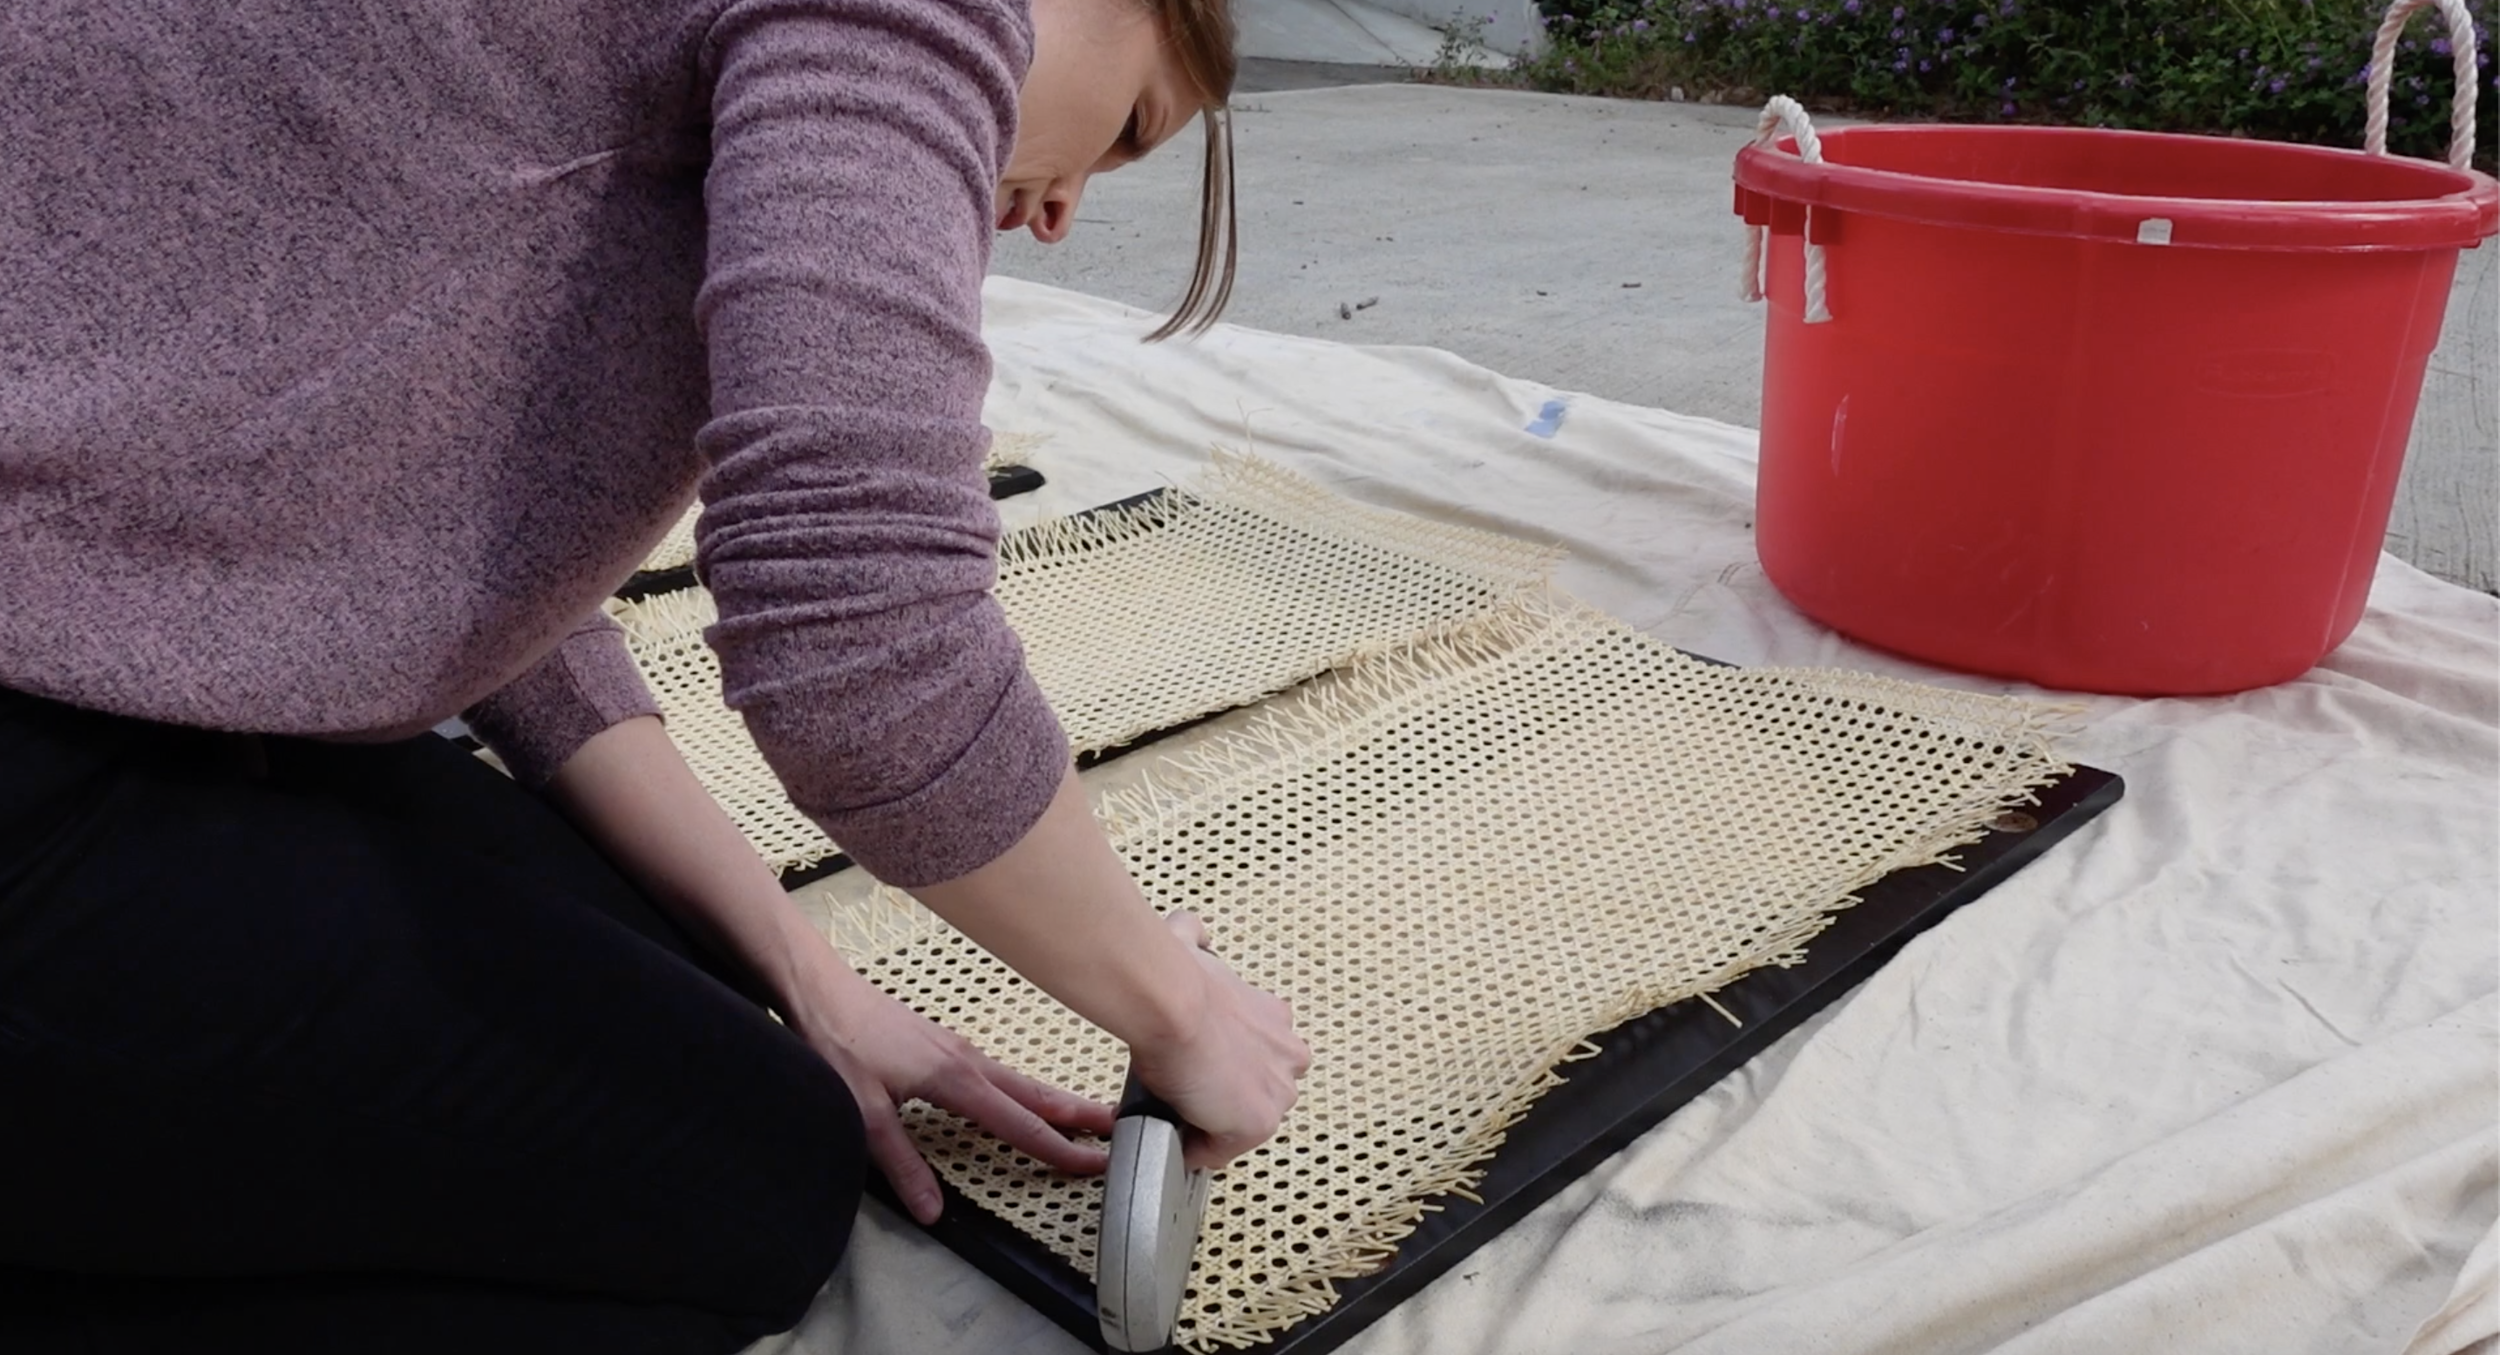
I went to the Cane & Basket Supply Co. in LA for my cane, where the helpful clerk calculated exactly how much I’d need. You can get the cane webbing and reed spline to make it look neat and finished. I originally got the spline, but putting it on ended up being a disaster so I ditched it. To add your cane…
First, soak it in warm water in the bathtub for 10 minutes. The clerk said that’s all you need—not an hour like he’d seen other YouTubers do.

Then you can staple the cane webbing onto the cabinet. Roll the cane out, hold it taut, and staple gun around the edge. Let it dry INSIDE (not in bright sun) for it to dry and get tight like a drum. I left it overnight, then trimmed off the excess.
STEP 6: Add handles.
I was obsessed with these gold half-moon handles. I’ve seen them on all sorts of pieces, and I thought they’d compliment the rounded arches well. I created my own template to drill the holes, but I would recommend a hardware template (see supplies) to ensure your holes are even. Mine are slightly crooked. Don’t look too close, please.

STEP 7: Congratulate yourself.
In total, I was able to create my custom cane cabinet for around $300 (way less than $2,000!). Considering that it was my first time using a jigsaw and I didn’t lose a limb, I’d call this a big-time win.

If you want to see the magic happen in real-time, watch the full episode and like & subscribe to Laugh Cry DIY on YouTube. You can also catch me on the @LaughCryDIY Instagram! Otherwise, enjoy more projects below.
✌️—Katy
⬇ I KNOW YOU WANT MORE ⬇


